Have you ever owned a beloved piece of clothing, only to be devastated when it got ripped or stained? It happens to me more often than I’d like to admit. Throwing the damaged item away feels heart-wrenching, and it also contributes to the growing issues of waste and limited landfill space.
The U.S. Environmental Protection Agency estimates that Americans produce 4.5 pounds of trash per person, per day. About 11% of that trash is comprised of rubber, leather, and textiles—all materials we tend to wear. This month, I decided to repair some damaged items in my wardrobe with the hopes of giving them new life and keeping them out of the trash bin.
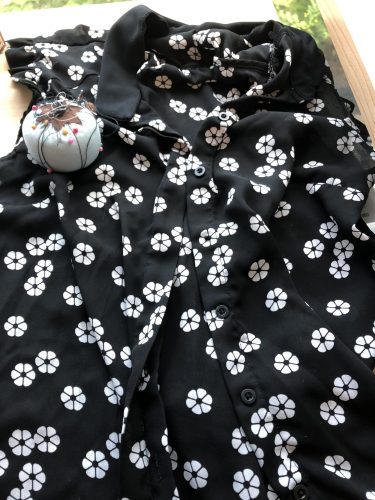
First, I set out to repair a blouse missing a strategically important button located right in the middle of the shirt. I stopped wearing the shirt because it awkwardly gaped open at unpredictable times.
Fixing a missing button sounds easy, but I didn’t have a matching button on hand and have been reluctant to buy a new set from the store when I only needed one. I also tried using a non-matching button I found in my sewing kit (leftover from a previous repair), but it was too big for the blouse’s buttonholes.
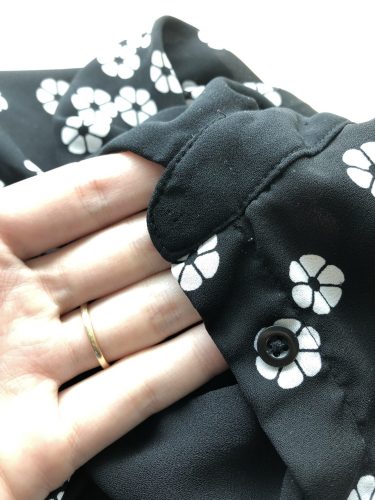
Hoping for a solution, I examined the shirt again and began to wonder if all of the shirt’s existing buttons are totally necessary. As it turns out, there is a button at the edge of the collar that I never use to close the shirt. I decided to transplant this button to the location of the missing button. For those less familiar with button-replacement, I found a great how-to guide from Love Your Clothes, a UK organization that aims to reduce the impact of clothes on the environment. After only a few minutes of sewing, my shirt was fixed! The gap in the blouse is now filled, and you can’t even tell that the collar button is missing.
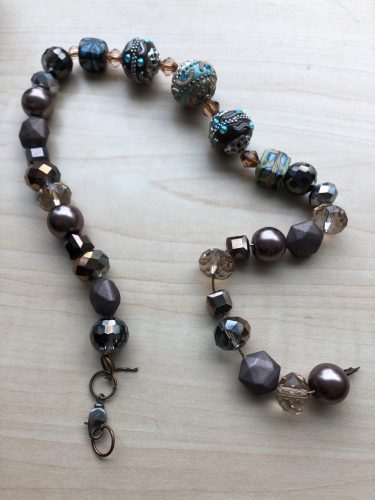
Next, I attempted to fix some broken jewelry — a necklace and bracelet that had both come apart near the clasp. Some online research revealed the problem part is called a “jump ring” and that loose jump rings are an easy fix. Using two pairs of long-nosed pliers and instructions from The Spruce, I reassembled the chain and tightened the jump rings. In minutes, the problem was solved and the jewelry was repaired!

Finally, I attempted to repair a broken pair of eyeglasses. The lenses are fine, but one of the arms on the plastic frame had snapped in half. I did some online research on how to fix broken eyeglass frames and found a good how-to guide from Vint and York. Following their recommendation, I used superglue to re-join the separated plastic parts. Stabilizing the frames while the glue dried proved a little tricky, but I managed to get the broken parts in the correct position before the glue set. So far, the repair seems strong, and the glued seam is barely visible!

In total, these repairs took under an hour to complete and only cost me around $3 (for the superglue). I’m excited to get the fixed items back in my wardrobe and am also glad to have reduced my landfill footprint. Unfortunately, not all broken items can be fixed at home, and some damaged things can’t be repaired at all.
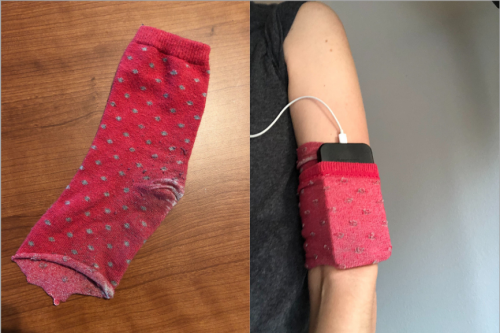
In some cases, however, broken items can be upcycled—transformed into something new and useful. There are loads of websites with instructions on how to upcycle all kinds of items, including Upcycle That, which organizes projects by material and product. One easy upcycle I completed recently involved old, worn-out socks. By simply cutting off the toe-end of the sock, I was able to transform it into an arm band for my phone for when I workout. While I’ve found it to be a little tricky to load my phone into the armband at the start of the workout, the sock band has kept my phone secure during both biking and jogging.
Repairing items can take time, so I’ve found it is most efficient to wait until I have multiple, similar projects to complete at once. Plus, since it takes me a while to get to the repairs, it often feels more exciting to reincorporate the fixed products back into my life! For more information on waste, repairs, and upcycling, check out the links below.
Links on waste, repairs, and upcycling:
US Environmental Protection Agency data on US Materials, Wastes and Recycling: https://www.epa.gov/facts-and-figures-about-materials-waste-and-recycling/national-overview-facts-and-figures-materials#Landfilling
Do Nation: https://www.wearedonation.com/do-actions/fix-it/#intro
Love Your Clothes- Reducing the Environmental Impact of What You Wear: https://www.loveyourclothes.org.uk/
The Spruce Crafts- Jump Rings: https://www.thesprucecrafts.com/fixing-jump-ring-problems-2051210
Vint & York Eyeglasses Repair Guide: https://www.vintandyork.com/content/how-to-fix-and-repair-glasses/
Upcycle That: https://www.upcyclethat.com
Lifehacker- Turn Sock into Arm Band: https://lifehacker.com/make-a-smartphone-holding-exercise-armband-out-of-a-soc-1294797141