What’s Changing
The Florida Museum intranet equipment calendars are migrating to Microsoft 365 calendars, which is the system that currently powers Gatormail.
Why We Are Migrating
Migrating our equipment calendars into UF’s approved scheduling system, Microsoft 365, allows us to leverage the familiar scheduling interface in Microsoft Outlook while modernizing the available scheduling features. Scheduling will be available via the Gatormail web interface or Outlook clients without the need of a VPN connection. Migrating also brings us into compliance with UFIT information system policies.
- View the Calendars
- Reserve the Equipment
View the Calendars
On a Mac:
- Open the calendar section of Outlook by clicking on the small calendar in the lower left of the outlook window.
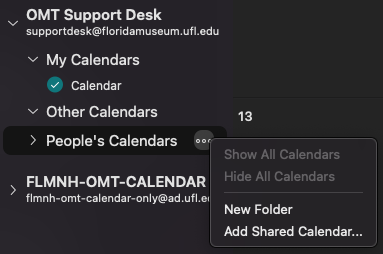
- Under your account, locate the People’s Calendars (see figure 1).
- Click on the ellipsis next to People’s Calendars.
- Then click on Add Shared Calendar…
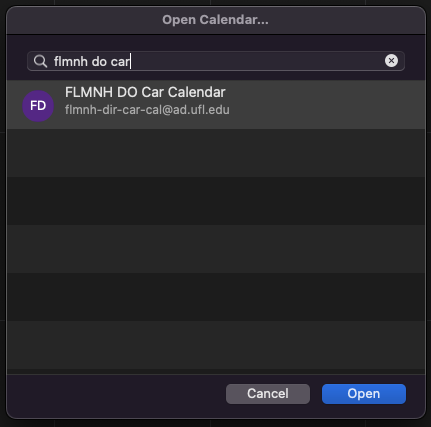
- In the Open Calendar pop-up type in the name of the calendar you are looking for (see figure 2).
- Click open
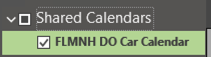
- You should see the calendar show up under People’s Calendars (see figure 3).

- Any calendar in the list can be hidden by unchecking the circle or box next to the name of the calendar.
On a Windows computer:
- Open the calendar section of Outlook by clicking on the small calendar in the lower left of the outlook window.
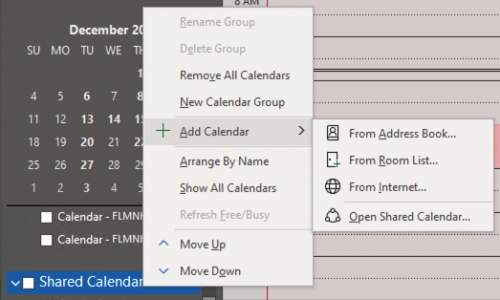
- Right click on Shared Calendars (see figure 4).
- Select Add Calendar then click Open Shared Calendar…
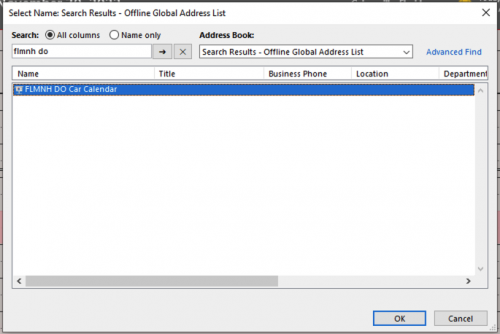
- In the first pop-up Click Name…
- In the next pop-up type in the name of the calendar you are looking for (see figure 5).
- Click on the calendar in the list, then click OK
- You should see the calendar show up under Shared Calendars (see figure 6).
- Any calendar in the list can be hidden by unchecking the circle or box next to the name of the calendar.
In Outlook for Web:
- Sign into Gatormail.
- Click the calendar icon in the upper left of the screen (see figure 7).
- Click Add calendar

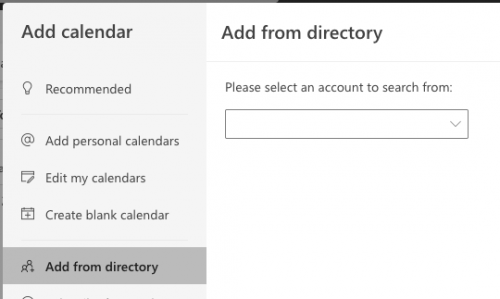
- In the Add calendar dialog select Add from directory (see figure 8)
- Select your email address in the ‘Please select an account to search from:’ dropdown
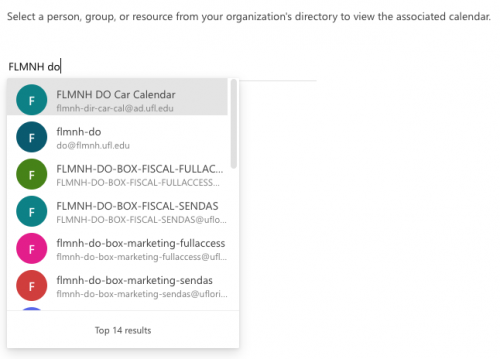
- In the new prompt enter the name of the calendar you are looking for (see figure 9).
- Click Add.
- You should see the calendar show up under People’s Calendars (see figure 10).
- Any calendar in the list can be hidden by unchecking the circle or box next to the name of the calendar.
Reserve Equipment
On a Mac:
- Open Outlook
- Go to your calendar
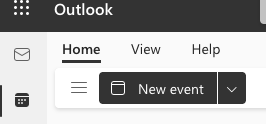
- Click New Event (see figure 11).

- Add a Name for your event on the line that says ‘New Event’ (see figure 12)
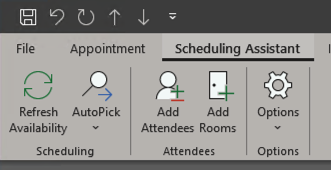
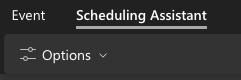
- Click on Scheduling Assistant, this is located near the top bar of the window (see figure 12).
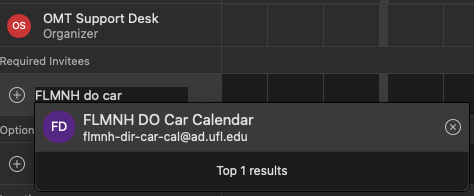
- Click on Add Required and begin typing the name of the calendar (see figure 13).
- Select the calendar
- Click done (see figure 14).

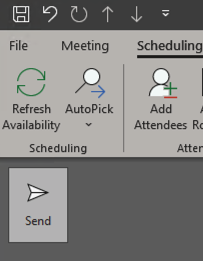
- Then click send.
- You will receive an email within a few minutes showing that your reservation has been accepted.
On a Windows PC:
- Open Outlook
- Go to your calendar
- Click New Appointment (see figure 15).

- Add a Name for your event on the line that says ‘Title’
- Click on Scheduling Assistant, this is located near the top bar of the window (see figure 16).
- Click on Add Required and begin typing the name of the calendar (see figure 17).
- Select the calendar

- Highlight the block of time you wish to use the equipment.
- Click send (see figure 18).
- You will receive an email within a few minutes showing that your reservation has been accepted.
In Outlook for Web:
- Sign into Gatormail.
- Go to your calendar
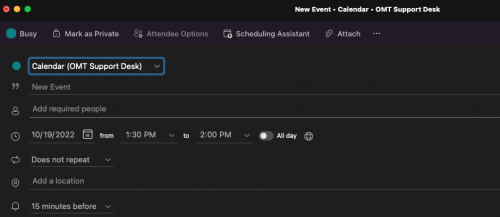
- Click New Event (see figure 19).
- Add a Name for your event on the line that says ‘Add a title’
- Click on Scheduling Assistant, this is located near the top bar of the window (see figure 20).
- Click on Add Required and begin typing the name of the calendar (see figure 21).
- Select the calendar
- Click on Event (see figure 20).
- Then click Save
- You will receive an email within a few minutes showing that your reservation has been accepted.