UFIT enabled the ability to restrict Zoom meeting participants to only people signed in with UFL accounts. It is UF’s recommendation that this feature be used when scheduling meetings where all participants are UF faculty, staff, or students Additionally, users are encouraged to require a meeting password for all meetings scheduled.
To schedule a password protected Zoom meeting that is only available to UFL Zoom accounts:
The preferred way to schedule a meeting is by creating it from within Outlook, using the Outlook Plugin. If you do not have access to the Outlook Plugin, you may also schedule it directly from within the Zoom client.
Both methods are shown below, plus a method for Mac users.
For Windows users – Outlook method:
1. Install the Zoom Microsoft Outlook plugin. (you only need to do this installation once).
If using a Museum PC or laptop, users can do this by going to their Desktop -> Software Center -> locate FLMNH – Zoom Outlook Plugin and click “Install”.
If using a personal PC, download from : https://ufl.zoom.us/client/latest/ZoomOutlookPluginSetup.msi
2. If Outlook was already open, close it, then reopen it. Click “Schedule a Meeting”, from the Zoom section of the top menu.

3. On the Zoom – Schedule Meeting window that opens up, click “Advanced Options” at the bottom to expand your options. Checkmark the two boxes “Require meeting password” and “Only authenticated users can join”.
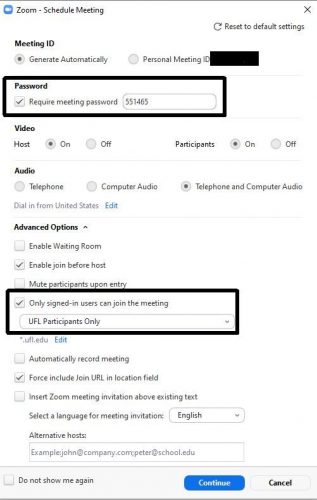
4. Click “Continue” to save and create your new Zoom meeting. A new Outlook Appointment window will open and show the new Zoom meeting details. From here you can invite people and send the meeting out. If you prefer to invite people and send out the meeting invitation at a later date instead, simply click File, then Save, and close the window.
You’ll see the Zoom meeting on your Outlook calendar.
For Windows users – Zoom method:
1. Install the Zoom Microsoft Outlook plugin. (you only need to do this installation once).
If using a Museum PC or laptop, users can do this by going to their Desktop -> Software Center -> locate FLMNH – Zoom Outlook Plugin and click “Install”.
If using a personal PC, download from : https://ufl.zoom.us/client/latest/ZoomOutlookPluginSetup.msi
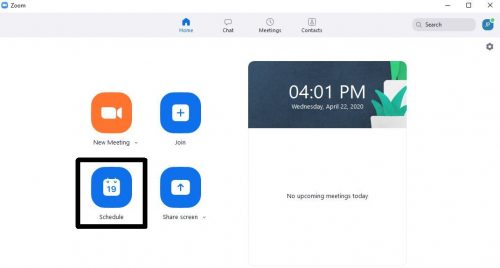
2. Start up Zoom and log in with your UFL credentials. From the Home menu in Zoom, click “Schedule”.
3. Choose a name and other details for your new Zoom meeting.
4. Click “Advanced Options” at the bottom to expand your options. Checkmark the two boxes “Require meeting password” and “Only authenticated users can join”.
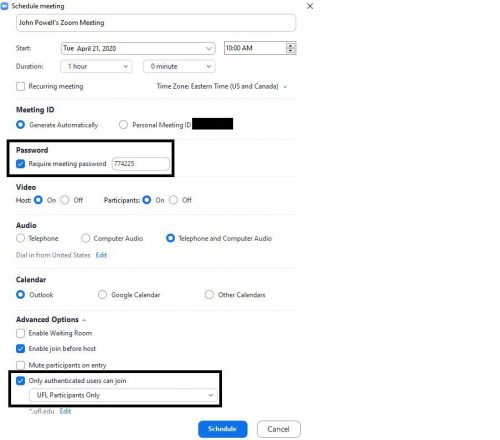
5. Click “Schedule” to save your new meeting. A new Outlook Appointment window will open and show the new Zoom meeting details. From here you can invite people and send the meeting out. If you prefer to invite people and send out the meeting invitation at a later date instead, simply click File, then Save, and close the window.
You’ll see the Zoom meeting on your Outlook calendar.
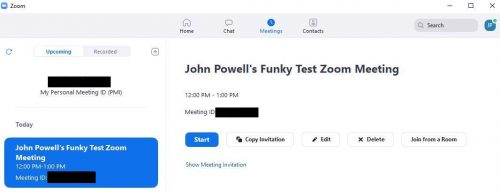
In addition to your Zoom meetings showing on your Outlook calendar, you can also see them from within Zoom itself, by clicking “Meetings” from the top menu.
For Mac Users:
1. Install the Zoom Microsoft Outlook Plug-in (you only need to do this installation once).
If using a Museum Mac, users can do this by going to their Applications folder -> Self Service -> Productivity -> locating the FLMNH -Zoom Microsoft Outlook Plug-in and clicking “Install”.
If using a personal Mac, download from https://zoom.us/client/latest/Zoom.pkg
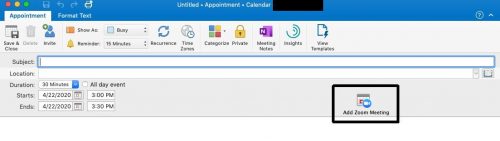
2. Start Outlook and open the Calendar. Create a new Appointment, choosing an appropriate Subject, date and time.
3. Click the “Add Zoom Meeting” button in the appointment window.
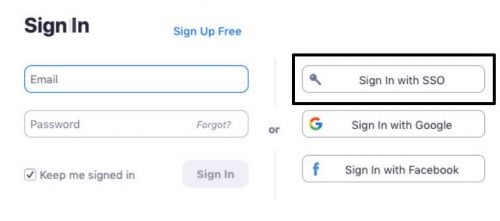
(If Zoom is not already running, you may be prompted to “Launch your Zoom client). When you do, be sure to click “Sign in with SSO”
then enter UFL for the company domain, and click Continue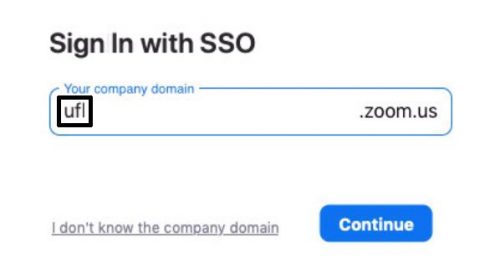
now Click the “Add Zoom Meeting” button in the appointment window.)
5. Make sure the boxes “Required meeting password” and “Only authenticated users can join” are checked, and click “Continue”.
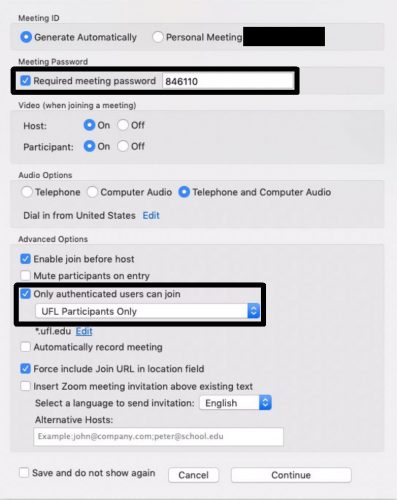
The new Zoom meeting appointment appears, and you can begin inviting or simply save for later.
Locking your Zoom Session
You may want to lock your Zoom session after it has started so that no additional participants can join, even if they have the meeting id and password. This adds another level of security to your meeting.
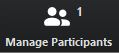
To lock your session after it has started, click “Manage Participants” at the bottom of the Zoom window.
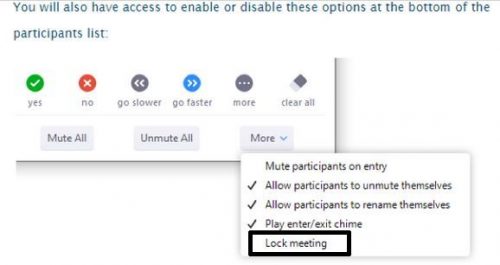
In the Participants pop-up box, at the bottom, click More, and then click the “Lock Meeting” button.
For more information, please visit UF’s extended e-Learning website section on how to keep Zoom secure:
https://elearning.ufl.edu/keep-zoom-secure/